Monday, November 23, 2020

I'm pumped!

 I've accomplished a few things since my last post.  I installed sound deadening material on the back wall of the cab in the Brat.  I already had done the floor a few years ago when I put in new carpet, but decided now was the time for the back wall since I had the panel removed to access the fuel lines. 


I decided to run a new fuel return line to replace the small and maybe inadequate stock one.  So I used a tubing bender and made a new hard line in 5/16 to match the supply.  It is quite crowded under the dash, but I was able to work it all under and around the pedals without too much trouble.  Should have just done it when I had the dash out.
The new return line emerges into the engine bay. 
Rather than pull the tank and braze a new 5/16 nipple on, I got one of those "retrofit" return line bungs where you drill a hole, and then by tightening a bolt, it smashes flat the inside to clamp it to the tank (think rivet) with an o ring to hopefully have a no drip seal.  My thought was if it leaks, I have to pull the tank anyway and I could patch it if it was no good. 
The new location for my filter/surge tank is just ahead of the passenger rear wheel. 
The new location for my high pressure pump is right behind the stock "lift" pump that feeds my surge tank now. 
I'm waiting for a few more feet of high pressure fuel line now to complete the runs under the hood, and then I'll be ready for a test drive!

Sunday, October 25, 2020

Fuel line reconsideration

 My new fuel pump was dripping gas at the high pressure side, and when I tried to snug it up the plastic cracked. place. 


 Lamenting the destruction of my second fuel pump, I also realized my gut feeling that having all the fuel stuff (surge tank, high pressure pump) under the hood right next to the engine was unnecessary risk for vehicle fire. The leaking pump really drove it home that it wasn’t some far of chance of gasoline spewing out into the hot engine at some point. So I took a step back and removed my pump bracket, surge tank and am finding homes for them back by the gas tank where they can leak as much as they like without causing me stress. Since this move was slowing down my chances of actually driving the car this October, I decided to embrace the schedule adjustment and take time to do some things the right way instead of rushing. I mounted my surge tank on the passenger side rail opposite the stock pump.  I bent a 5/16 hard line to replace the 1/4 return line and another to carry the supply from the low pressure pump across the car to the surge tank. 


I still need to bend one more line. Bending lines is super fun old man stuff. I’m also going to replace the chewed up insulation behind the seats with some more insulating sound deadening material.  

You can see my new return line clipped into place. 


Friday, October 23, 2020

It runs again!

I figured out why I was having trouble putting the gauge cluster back into place, I was trying to line it up with the wrong holes.  Age has softened the impetuousness of youth and I did not just smash it in thankfully. Know when to smash and when not to smash is the sign of an experienced mechanic. My high pressure fuel pump got dropped too much and wasn’t working, so I ordered and received my new one from rock auto. I put it into place tonight and fired the car up! Pretty excited to hear it run again this time with the cat on so it was not deafening. I filled it with coolant and started it again to let it get up to temperature but stopped quickly as I noticed a fuel leak from the new high pressure pump. I’ll try to tighten it up tomorrow but I’ve got a nervousness about having all that gas fittings and pump under the hood now. If this thing burns down my sadness will be immeasurable and my day ruined. I may move the surge tank and fuel pump back closer to the gas tank, but I think I’ll take it for a spin once before I start removing components again making it immobile again. 


Sunday, October 18, 2020

Chugging along


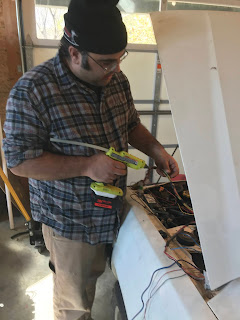
 Matt Bengry generously donated another Sunday to working on my brat. A little hot glue to water proof some splices under the hood. 
We got the fan relays wired up, the dash reinstalled and most of the wires hooked back up. I then proceeded to turn the key forward not realizing it was already in the on position, causing the car to turn over since the brat did not have a neutral safety switch and since it was in gear it drove itself off the sideways wheels it was sitting on instead of jack stands. No injuries to the people or car involved, just a lot of laughing at stupidity and glad we didn’t have to have a near miss safety meeting. We spent the last hour of working chasing some strange key gremlin where the key functions off, accessory, run and start all work correctly, but lock functions kind of like on, but with 10v instead of 12v.


I think the switch is funky and I’ll replace it since it is still available. I’m also failing at getting the gauge cluster to go back in place. More work to do, I need to put my specialist on it.  

I also did some grinding and removed the heat shield to get the cat to fit, you can see my addco sway bar mounted. 

Saturday, October 17, 2020

Dash removal


 I removed my dash to get better access for installation of the new ecu and to also clean out the vents and replace the heater core. I found plenty of mouse droppings in the vents and a giant nest near the blower. I was able to sanitize the vents, so hopefully it won’t smell like mouse pee and blow hantavirus in my face.   I used a factory service manual to label my dash wires for splicing with the EJ ecu.

I also selected an unused function of my “telltale” light to act as my check engine light since the 82 Brat did not have one. It is the upper light which I think illuminates a halo strong the shape of the car image on the dash, I’m assuming it’s to indicate when you have the cabin lights on, but I’ve never seen it do anything. It’s visible enough to be useful and pretty enough that I can ignore it being on constantly. ;)

Saturday, October 3, 2020

Brazen modficiation

 My stock Brat radiator has now been modified to accept 1.5" hose just like the stock EJ radiator.  I called around to many good independent auto repair shops in Lafayette and they all said that the only radiator repair guy they knew was Mark in Dayton and he is retired.  So I found a shop in Frankfort would said they could do it, so I had the radiator dropped off in the morning and they called me in the afternoon to say it was done.  


It was Jerry's Body shop & Radiator, I would highly recommend them, the end result was "a-brazing"!  


I finished up the shroud, bolted on the fans in place, and then dropped it into location.  

I found that the stock EJ hoses fit now very perfectly with only a little trimming of length from each end to shorten them up to compensate for the much closer radiator position and slightly more narrow radiator.  It is nice to know that I can use off the shelf hoses with a little trimming.  So much better than having to cobble together different size hoses and couplers.  I should probably put new hoses on it, but I'll just use these for the shakedown. It's starting to seem like a real car again, it's a great feeling to be completing tasks and crossing things off my list.  


I need to rig up a temporary exhaust, as the headers just dump right out at the moment under the passenger floorboard.  Once I get it driving I'll take it to a muffler shop and have them build the pipe to fit so I can incorporate the stock cat and resonator and O2 sensors.  A little of the iconic subaru boxer sound would be nice, but what I'm actually after is quiet enough that I can hear my radio.  

The last big project that remains is the permanent installation of the ECU and wiring harness.  I will pull the dash for install and replace the heater core while I'm in there.  I already modified the EJ ECU to fit into the space for where the 82 computer controlled carburetor controller was housed under the steering wheel.  


Tuesday, September 29, 2020

Radiator shroud & fans

 There is no room for stock EA fans, although one of them would fit with a little trimming.  I decided to build a shroud and use electric puller fans.  I want to reserve the space where the condenser goes so that I retain the option to get my AC installed and going without having to re-do any of the work for the cooling system.  Pusher fans would take that space, plus with the cyclops light on the Brat there is even less room behind the grill for extra fans.  I settled on the following design.  There is about 10" on the left side of the crank pulley where the motor sits 3.5" away from the timing belt cover.  There is about 6 inches on the right side of the crank pulley where the timing belt cover is 3.5" away from the radiator.  


A 10" fan fits nicely on the left but a 6" seems to approach too closely to the crank pulley for comfort.  So I opted to install two 5" fans on the right so the crank pulley can nest down inside, with the 10" fan on the left. The shroud serves to hold the fan in place and also to force the fan to draw air through the radiator.  If there was no shroud, some air would come through the radiator but most would just come from around the radiator.  Using a shroud essentially turns the puller fan into a vacuum that forces air through the radiator. 


I cut the holes into a sheet of 16ga steel which if I was doing it again I would probably make from aluminum and maybe a lighter gauge.  It is heavier than I anticipated.  I cut the holes and I'll decide how to secure the fans.  I may just drill through and use a button head screw, but I might also weld tabs on the motor side and use the captive nut slots on the SPAL fans.  They are lo-profile and are really quite slim, they seem high quality, I'm glad to have laid out the extra money for the SPAL name instead of a generic fan.  

Saturday, September 26, 2020

Addco sway bar

 The front sway bar on my brat hits the FT4WD 5 speed transmission I've used in my swap.  I looked at modifying the sway bar, but as I read it sway bars are tempered and spring steel and other metallurgical things I don't understand and cutting and welding it makes it not work as well.  The place it hits the transmission is the spot where it climbs up into the subframe to allow the exhaust to pass underneath.  I learned that Addco made a performance sway bar for the EA81 cars including Brat, and it is much stiffer than stock and larger, at 1" in diameter.  Because of the size of it, Addco made the loop drop down instead of up, which means it will not interfere with the transmission.  So I tried to order one through JEGS, but they cancelled the order after a few days saying it was no longer stocked and not in production.  So I did the next best thing and contacted Addco directly.  I asked if they would custom make one for me or how many orders would it would take to get another production run.  I got an e-mail response that said they were "very unpopular" and that I was the first person to inquire about them in 5 years, and they did not have any more stock and were not going to make another production run.  However, he said, "do not despair" and offered to sell me the control bar, which is the one they check all the production runs against to ensure accuracy.  Since they were not going to produce more they wouldn't need it.  So he had it sent off to get blasted and powder coated since it had been collecting dust for years, and a few days later I received the last front and rear performance sway bars for EA81!  

The Brat did not come with a rear sway bar stock, so I'm excited to see how it handles with less body roll front and rear.  The front bar clears the transmission nicely as I hoped, and the rear fits perfectly into place.  The front bar was mistakenly supplied with two wrong brackets, but I can't blame them for mistakenly picking the order, they probably don't have much practice on this particular setup.  New front brackets should arrive soon.  Seeing these new parts and high quality bushings makes me realize that this car is actually 38 years old and every piece of rubber needs replaced.  That can wait for a while though!  Lets just call the service life 40 years and that should give me some time to enjoy it before it needs more attention.  


I set the Brat down from jack stands and put it on a spare set of rims so I could compress the suspension for installation and still have room to roll around underneath.  The flash makes the Brat look rustier than it is, this car is still amazingly solid, just surface rust present.  When I was at the junkyard the other week pulling some parts they guy asked me what Subaru I was working on and he said about 15 years ago they had someone drive in a Brat to sell for scrap and they used it as a yard car for several years without doing anything to it until one day they were blasting through some tall grass and hooked the oil pan on a truck frame laying hidden in the weeds.  The sad eventual fate of all novelty vehicles is to end up at the junkyard.  

Wednesday, September 23, 2020

EJ22 airbox into EA81 Brat

 The 1995 Legacy airbox that came with my donor car has an angled snorkel and did not fit great in the Brat body.  I pulled a snorkel and air box from a 92 legacy that fits much better, the MAF meets the airbox at 90deg instead of 45 which works better for the space.  I had to remove my AC relays from the strut tower and reroute (lower) the factory wiring harness from the Brat to get it in place, but it looks good and secure.  The only problem was the inlet to the filter on the under side of the box was almost flat against the fender.  I could have drilled into the fender to supply air but decided I would put speed holes into the lower box instead. 


I had to cut off the mounting feet from the bottom of the housing to make it fit so I need to attach it to the Brat somehow, but I don't expect that to be a big problem. 

Tuesday, September 22, 2020

EJ22 Pitch stopper

 The EA81 engine in my Brat had a pitch stopper, and so do the EJ22 and EA82 engines.  The EA81 pitch stopper is not in the same place or same design as the more modern ones, so I had to modify mine to fit the new EJ motor.  I cut it shorter and welded it back together, and then drilled a piece of flat bar to bolt onto the adapter plate that mates my full time 4wd transmission from an EA82 GL10 Turbo to the EJ motor from the Legacy.   

The stock brat mount remains unmodified.  I guess the purpose is to prevent the motor from shifting with torque.  Some don't run them after conversion, mine was easy enough to make that it might as well go in. 

The Brat sat under a cover indoors for the last few years, thankfully it survived without any major damage, but it did accumulate a large amount of mouse crap.  Thankfully they didn't seem to ruin my new carpet or seats. 

Sunday, September 20, 2020

Surge tank & high pressure fuel pump

A carburetor has a bowl of fuel to draw from in the event that the fuel pump sucks some air if the fuel in the tank is low  and sloshing around.  In a fuel injected car, there is no reserve and the fuel must be supplied at a specific pressure, so any air in the line from sloshing is bad. Fuel injected cars have baffles to trap the fuel around the pickup in the tank, but they are not present in a car designed for a carburetor.  There was a turbo brat with fuel injection for 2 years (I think) that had a baffled tank and would bolt in, but they are much more rare than a regular brat, especially 38 years later, so impractical to find.  So I'm installing a surge tank, which is essentially a small bowl of fuel that feeds the high pressure pump, keeping a steady supply.  Race cars typically use aluminum or stainless and that all seemed out of place in a cheap old car.  I settled on the following solution.  A marine fuel filter / water separator that has the necessary 4 ports already was a great place to start. 


The existing low pressure fuel pump supplies gas into the filter.  The high pressure pump draws from the filter.  The return from the fuel rail returns to the filter.  When the filter is completely full then the fuel returns to the tank.  I had to modify the fuel filter bracket just a little.  The two "in" ports are independent of each other, but the "out" ports are connected by the casting.  I tapped the casting on the overflow "out" and put a set screw in it to separate it from the high pressure pump feed "out".  I then had to drill into the casting after my plug to open up the overflow "out" so it would allow a full filter to return to the tank.  To mount it all, I decided on the drivers fender where the old jack holder was.  

I bent a bracket from 16 ga steel to support the filter, and then made a fuel pump bracket from 20 ga and used the toggle clamp from the stock fuel filter to close it. There is a rubber strip around the filter to dampen vibration and also hold it snug in the metal clamp.

 I've got both brackets screwed in for fit up, once I'm "finished" I'll go back and tack them in place.  I've got all the the lines mocked up with whatever hose I had lying around, I'll replace them with appropriate new fuel line and then I'll have the fuel system sorted! 


Some of the EJ swap write ups claim the stock return line is too small, but I'll give it a try and if it not able to keep up with the return feed I'll run a larger return line.  The stock brat return line is 1/4" and the supply is 5/16" by my measure.  I don't want to drop the tank and install a bigger bulkhead fitting for return, but I will if its necessary.  


Thursday, September 17, 2020

EJ Start -


 This motor has not run in 6 years, what a great engine!

Resurrection - Brat & Blog


 To bring everyone up to speed, the motor swap was a larger project than I anticipated, and after several years of procrastination, my friends agreed to come help me finish this bad boy.  The EJ starts and runs.  Now I need to do a few finishing problems.  Here is a list of my problems, and I"ll make a post of each of my solutions so that this blog might be a good reference in years to come.  Since I started this swap, Photobucket broke the internet and sank most the useful forum posts.  So hopefully blogger never follows suit.  


Things needed to finish my EJ 2.2 Swap into my 1982 Brat EA81.  

  • I need to adjust the front anti sway bar, the hump hits my full time 4WD 5 speed from a GL10 turbo wagon.  
  • Fuel - surge tank and high pressure fuel pump
  • Exhaust - attach cat, oxygen sensors & muffler
  • Integrate the wiring harness and ECU into the Brat in a clean fashion
  •  Radiator & cooling setup
  • Install Oil pressure and Temperature sending units that work with the Brat gauges
  • Air box install
  • Battery relocate