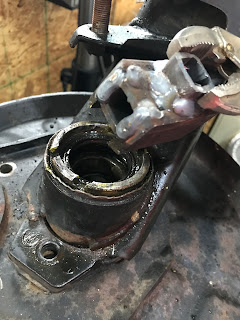
The rear wheel bearings in the Brat (which is actually using 1988 GL10 rear wheel discs and thus also bearings) has a bearing retainer that is difficult to remove. So I made a tool. It worked nicely, but I would definitely need higher carbon steel for the part that slips on to my 1/2" impact driver, as it has already started to bend. I remembered the Brat in rose colored glasses as nearly perfect, when as I work on it I realize that pretty much every wear component is due for replacement. So thus I'm firing up the parts cannon and blasting this thing with all the new parts I can source. The rear wheel bearings had a surprising amount of slop in them despite not making much noise, although it would have been hard to hear over all the other noises.
Sunday, June 11, 2023
Saturday, June 3, 2023
Brazing the gas tank
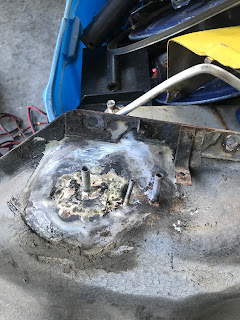
I removed the tank and then the drill only bung from summit that leaked immediately. I then made a patch from some 20ga sheet metal and a bit of brake tube for a nipple and brazed the whole thing together. No leaks! First time brazing, seems pretty easy for this application. No tank exploding because I get the fumes out before torching it.
Monday, November 23, 2020
I'm pumped!
I've accomplished a few things since my last post. I installed sound deadening material on the back wall of the cab in the Brat. I already had done the floor a few years ago when I put in new carpet, but decided now was the time for the back wall since I had the panel removed to access the fuel lines.
I decided to run a new fuel return line to replace the small and maybe inadequate stock one. So I used a tubing bender and made a new hard line in 5/16 to match the supply. It is quite crowded under the dash, but I was able to work it all under and around the pedals without too much trouble. Should have just done it when I had the dash out.
The new return line emerges into the engine bay.
Rather than pull the tank and braze a new 5/16 nipple on, I got one of those "retrofit" return line bungs where you drill a hole, and then by tightening a bolt, it smashes flat the inside to clamp it to the tank (think rivet) with an o ring to hopefully have a no drip seal. My thought was if it leaks, I have to pull the tank anyway and I could patch it if it was no good.
The new location for my filter/surge tank is just ahead of the passenger rear wheel.
The new location for my high pressure pump is right behind the stock "lift" pump that feeds my surge tank now.
I'm waiting for a few more feet of high pressure fuel line now to complete the runs under the hood, and then I'll be ready for a test drive!
Sunday, October 25, 2020
Fuel line reconsideration
My new fuel pump was dripping gas at the high pressure side, and when I tried to snug it up the plastic cracked. place.
Lamenting the destruction of my second fuel pump, I also realized my gut feeling that having all the fuel stuff (surge tank, high pressure pump) under the hood right next to the engine was unnecessary risk for vehicle fire. The leaking pump really drove it home that it wasn’t some far of chance of gasoline spewing out into the hot engine at some point. So I took a step back and removed my pump bracket, surge tank and am finding homes for them back by the gas tank where they can leak as much as they like without causing me stress. Since this move was slowing down my chances of actually driving the car this October, I decided to embrace the schedule adjustment and take time to do some things the right way instead of rushing. I mounted my surge tank on the passenger side rail opposite the stock pump. I bent a 5/16 hard line to replace the 1/4 return line and another to carry the supply from the low pressure pump across the car to the surge tank.
I still need to bend one more line. Bending lines is super fun old man stuff. I’m also going to replace the chewed up insulation behind the seats with some more insulating sound deadening material. 
You can see my new return line clipped into place.
Friday, October 23, 2020
It runs again!
I figured out why I was having trouble putting the gauge cluster back into place, I was trying to line it up with the wrong holes. Age has softened the impetuousness of youth and I did not just smash it in thankfully. Know when to smash and when not to smash is the sign of an experienced mechanic. My high pressure fuel pump got dropped too much and wasn’t working, so I ordered and received my new one from rock auto. I put it into place tonight and fired the car up! Pretty excited to hear it run again this time with the cat on so it was not deafening. I filled it with coolant and started it again to let it get up to temperature but stopped quickly as I noticed a fuel leak from the new high pressure pump. I’ll try to tighten it up tomorrow but I’ve got a nervousness about having all that gas fittings and pump under the hood now. If this thing burns down my sadness will be immeasurable and my day ruined. I may move the surge tank and fuel pump back closer to the gas tank, but I think I’ll take it for a spin once before I start removing components again making it immobile again.
Sunday, October 18, 2020
Chugging along
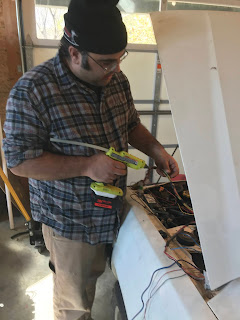
Matt Bengry generously donated another Sunday to working on my brat. A little hot glue to water proof some splices under the hood. We got the fan relays wired up, the dash reinstalled and most of the wires hooked back up. I then proceeded to turn the key forward not realizing it was already in the on position, causing the car to turn over since the brat did not have a neutral safety switch and since it was in gear it drove itself off the sideways wheels it was sitting on instead of jack stands. No injuries to the people or car involved, just a lot of laughing at stupidity and glad we didn’t have to have a near miss safety meeting. We spent the last hour of working chasing some strange key gremlin where the key functions off, accessory, run and start all work correctly, but lock functions kind of like on, but with 10v instead of 12v.
I think the switch is funky and I’ll replace it since it is still available. I’m also failing at getting the gauge cluster to go back in place. More work to do, I need to put my specialist on it.
I also did some grinding and removed the heat shield to get the cat to fit, you can see my addco sway bar mounted.

Saturday, October 17, 2020
Dash removal
I removed my dash to get better access for installation of the new ecu and to also clean out the vents and replace the heater core. I found plenty of mouse droppings in the vents and a giant nest near the blower. I was able to sanitize the vents, so hopefully it won’t smell like mouse pee and blow hantavirus in my face. I used a factory service manual to label my dash wires for splicing with the EJ ecu.
I also selected an unused function of my “telltale” light to act as my check engine light since the 82 Brat did not have one. It is the upper light which I think illuminates a halo strong the shape of the car image on the dash, I’m assuming it’s to indicate when you have the cabin lights on, but I’ve never seen it do anything. It’s visible enough to be useful and pretty enough that I can ignore it being on constantly. ;)


